
At this step-by-step guide, you can find how to install Let's Encrypt SSL Certificate at GoDaddy or HostBrook Linux shared hosting with cPanel. The described way below is very simple and provides automatical renewal of the Let's Encrypt Certificate, therefore you will not require to update SSL Certificate every 90 days.
Go to your account - "My Products". Find "Web Hosting" group and click "Manage":

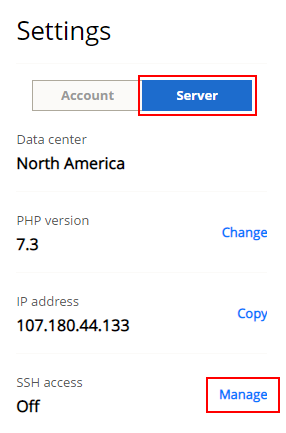
At the "Settings" group click the tab "Server" and next click the link "Manage" beside "SSH access":
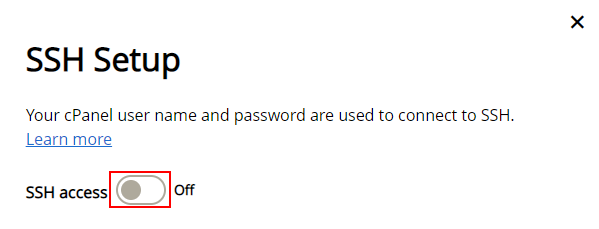
In the modal window switch SSH Access to "On":
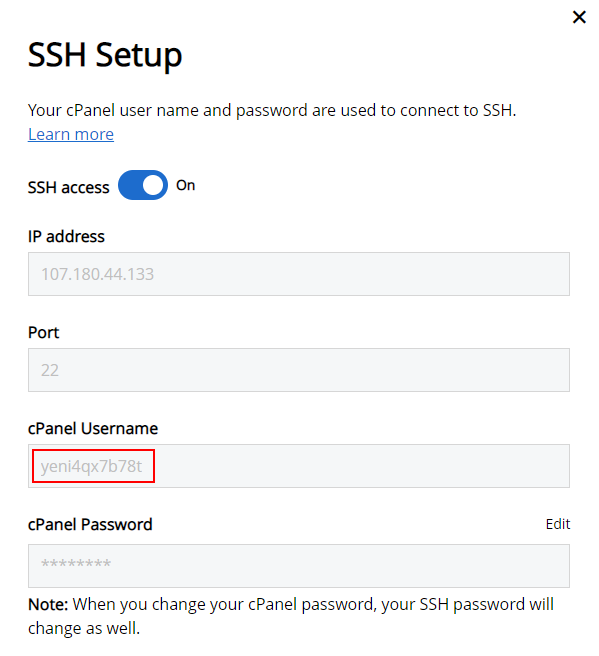
Copy data from the field "cPanel Username" somewhere in a text file at your PC. You will need it in future steps:
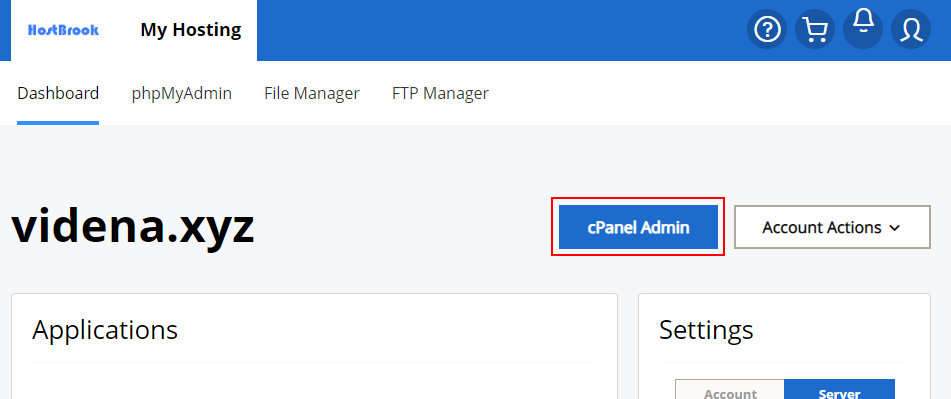
Here at the page, hit the button "cPanel Admin":
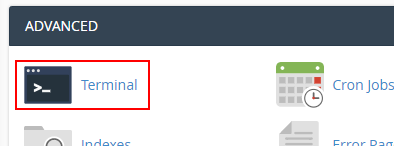
At the cPanel find the group "Advanced" and click "Terminal":
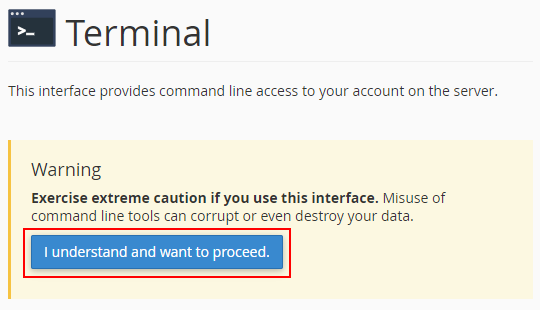
At the new window open hit the button "I understand and want to proceed.":
Wait until login in the terminal occurs.
Set Let's Encrypt as a default CA:
acme.sh --set-default-ca --server letsencrypt
Use this template of the command to issue Single or Multiple domain Certificate:
acme.sh --force --issue -d example.com -d www.example.com -w /home/[username]/public_html
Copy the template above and paste it in the terminal command line.
Replace "example.com" with your domain name and "[username]" with your cPanel Username saved at step #1.
Here is the example of the command to issue the Certificate:
Press ENTER and wait until Certificate be issued:
Use this template of the command to deploy Single or Multiple domain Certificate:
acme.sh --deploy -d example.com -d www.example.com --deploy-hook cpanel_uapi
Copy the template above and paste it in the terminal command line.
Replace "example.com" with your domain name.
Here is the example of the command to deploy the Certificate:
Press ENTER and wait until Certificate be deployed:
The last thing you need to done is a rederecting of your users to SSL connection only. By default, if the user enter url of your website starting from "http://" unsecured connection will be established. To prevent this you need:
Click "File Manager" at the tab "FILES":

This file should be at the "public_html" folder

If you can not find this file in the folder, probably you need to Show Hidden Files.
RewriteEngine On
RewriteCond %{HTTPS} off
RewriteRule ^(.*)$ https://%{HTTP_HOST}%{REQUEST_URI} [L,R=301]
Do not forget to update your site URL in WorPress settings with https://
To prevent error "HTTPS Mixed Content Warning" or "Unsecure connection" in the browser bar, you need to update all links to images, video, files and etc. at your website content which now needs to be begins with "https://" or "//", for example:
https://mywordpresssite.com/wp-content/uploads/someimage.jpgor:
//mywordpresssite.com/wp-content/uploads/someimage.jpg